Secure. Connect. Protect.
SmartBiz connects your business to incredible Internet and provides powerful tools to increase productivity, delight customers and keep your business data secure.
Clearwave Fiber meets the needs of small businesses with an all-in-one managed service that increases staff productivity, secures critical business systems and drives customer loyalty.
Hassle-Free Business Cybersecurity
Guard your networks, Wi-Fi connected devices, sensitive data, staff and customers with 24/7 malware, virus and threat defense tailored for business.
Back-Up Internet Connectivity
Downtime is costly. Ensure critical business systems are always operational with built-in Network Resilience cellular backup.
Simple Network Management
CommandWorx™ app simplifies network management and visibility. View connected devices, staff usage and security alerts. Boost productivity by enabling content restrictions to block access to harmful or inappropriate Internet content.
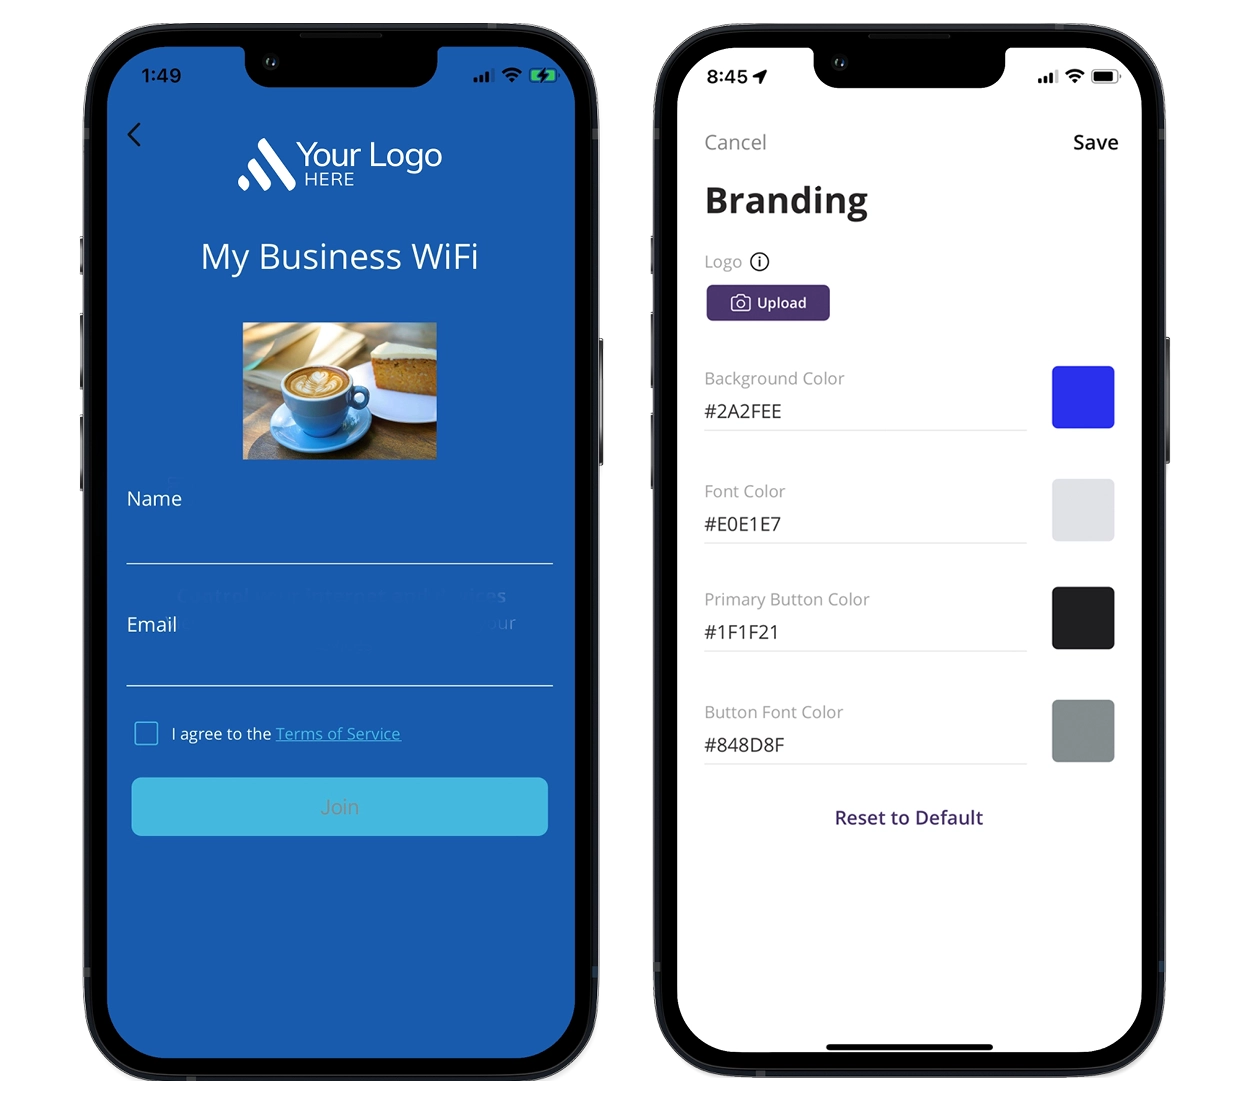
Branded Customer Wi‑Fi Portal
Attract customers with free and secure Wi-Fi with your business’ brand and colors. Set access hours for days and hours customer Wi-Fi is available. Drive brand loyalty with targeted campaigns utilizing customer portal usage insights delivered right to your email.
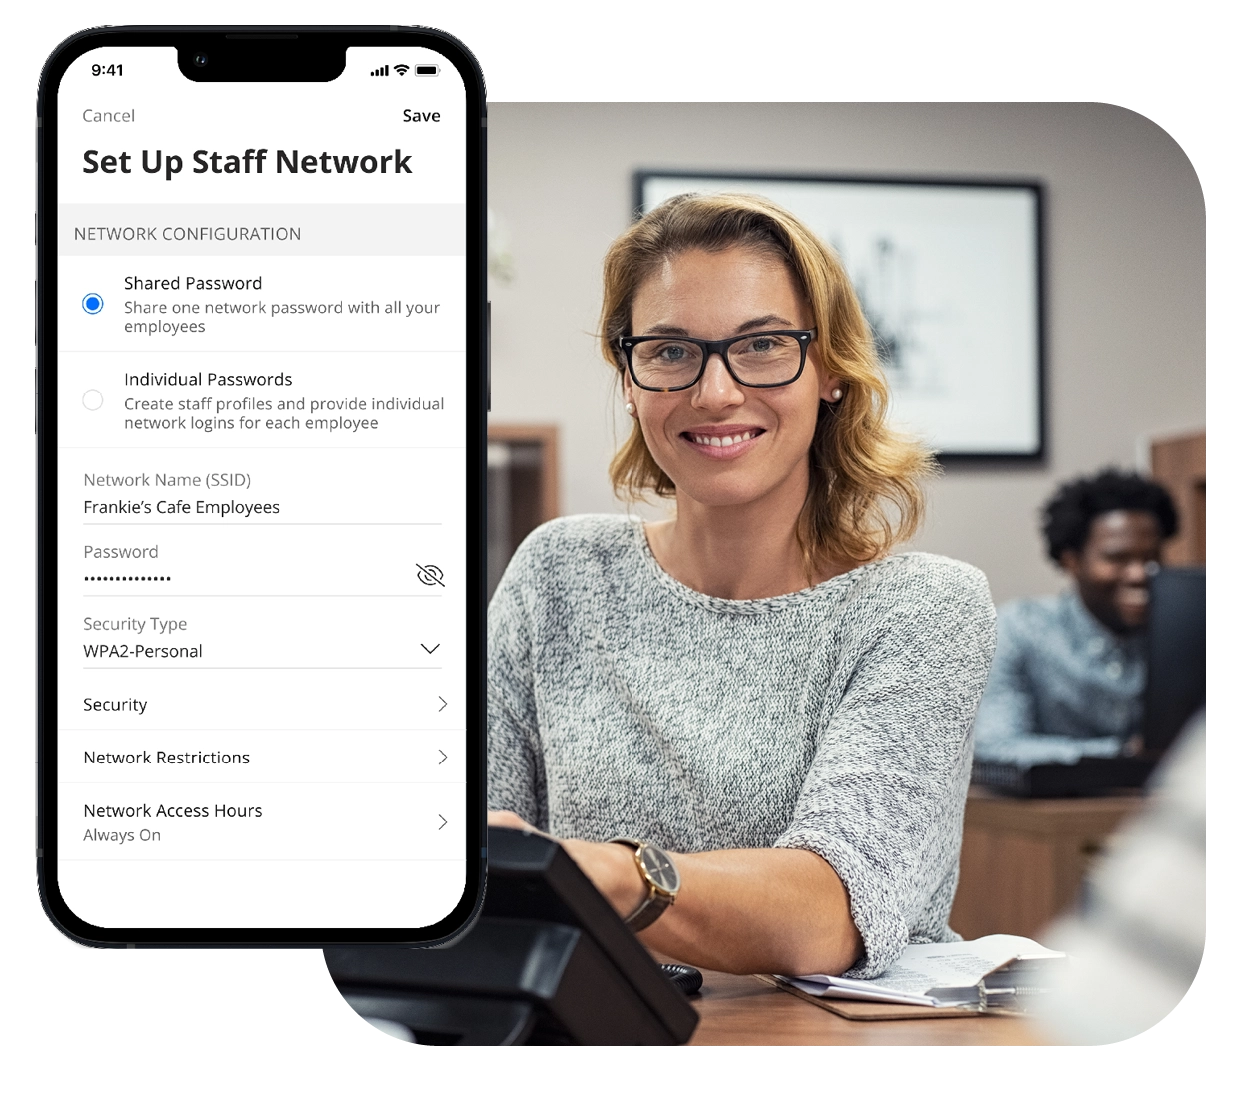
Staff Management
Deliver amazing bandwidth for employee activity, including office and productivity applications, without impacting primary network functions. Small business owners can easily update access settings to keep pace with staff changes.
Exceptional Wi-Fi Coverage, Inside and Out
Clearwave Fiber SmartBiz delivers an all-in-one managed Wi-Fi experience for small to medium businesses. Maximize productivity with seamless wired and wireless internet coverage everywhere you need it, inside and out, and rest assured it’s all protected with built-in network security.


Frequently Asked Questions
Go to Networks
Tap the Network you want to modify
Tap Edit in upper right corner
Change the Network Name and/or Wi-Fi Password
Tap Save
Go to Networks, tap the Primary network, and tap Edit
- Enter a Network Name (SSID) and Wi-Fi Password and select a Security Type
- Tap Save
Tap Network Security
- See How do I set up the Trusted List?
- See How do I set up Skipped Devices?
- See How do I set up Intrusion Settings?
Tap Content Restrictions
- See How do I set up Content Restrictions?
Tap the toggle of the following restrictions to enable or disable:
- Safe Search: filters out potentially offensive and inappropriate search results
- YouTube Restrictions: filters out potentially mature and inappropriate video content
- Block DNS over HTTPS: prevents resolving encrypted DNS requests
Does not prevent encrypted website traffic (e.g., https://abc.xyz) - Block iCloud Private Relay: prevents routing web traffic through Apple’s iCloud service
Tap Content Restrictions
- Tap the dropdown menu to select a preset grouping of content categories
- Alternatively, tap the toggle of individual categories to enable restricting that type of content
Tap Applications
- Search for specific mobile applications
- Tap the mobile application to set restrictions:
Block: total restriction
Always allow: no restriction
Allow for: restricted after a set amount of usage - Tap the X to remove the mobile application restriction
Tap Websites
- Enter a website URL and tap the + button to set restrictions
- Tap Block or Always Allow
- Tap the X to remove the website restriction
Add a Profile
- Go to Staff and tap the + button
- Enter the employee’s name and email address
- Select a Device Registration type
High Trust: employee can connect any device
High Control: devices require approval through CommandWorx, limited to 3 devices
Delete a Profile
- Go to Staff, tap a Staff Profile, and tap Edit
- Tap Delete Staff and confirm deletion
Go to Devices and tap the + button
Devices can be added by entering the Network’s Wi-Fi credentials on the Device or using WPS
To add via Wi-Fi credentials:
- Tap the dropdown and select which Network you want to add the Device to
- Connect the Device using the Network Name (SSID) and Password
To add via WPS (Devices page):
- Tap the dropdown and select which Network you want to add the Device to
- Tap the Connect button to enable WPS for 2 minutes
- Press the WPS button on the Device you want to add to the selected Network
To add via WPS (Point of Sale Network):
- Go to Networks and tap the Point of Sale network
- Tap the Connect Device via WPS button to enable WPS for 2 minutes
- Press the WPS button on the Device you want to add to the Point of Sale network
Have more questions?
Find answers here:
Get Started Today
With SmartBiz by Clearwave Fiber, your business can enjoy a simple solution to manage your network, protect you from cyberattacks, increase staff productivity and secure an always‑on connection.
Request a Demo
Call
Reach out to our sales team
Reach out to our sales team